

Author
Vio TeamPublished
2 mins readEvery order in Vio starts with a customer. Before you can sell to someone, their record needs to exist — so setting up customers is one of the first things worth doing in a new workspace.
There are two ways to add one: ask your assistant in plain language, or fill in the form yourself. Either way, the result lands in the same place.
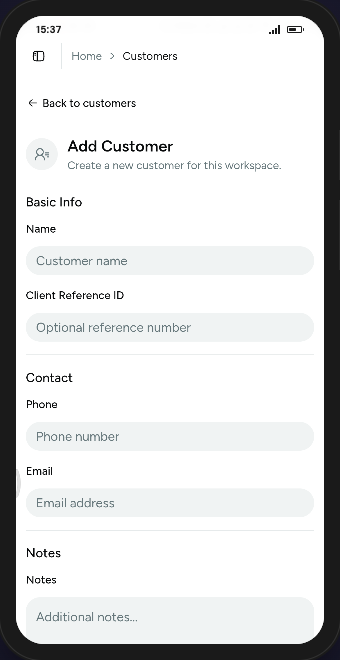 The Add Customer form keeps things short: name, an optional reference ID, contact details, and notes.
Add a customer step by step
- Open Customers in your workspace and click the + button.
- Under Basic Info, enter the customer’s Name. This is the only required field.
- Add a Client Reference ID if you track customers under your own numbering — it’s optional but handy for matching records later.
- Under Contact, add a Phone number and Email so you can reach them.
- Use Notes for anything else worth remembering about the customer.
- Save, and the customer appears at the top of your list.
Prefer to skip the form? Just tell your assistant something like “Add a customer: Jane Doe, +54 11 1234-5678, jane@example.com” and it creates the record for you.
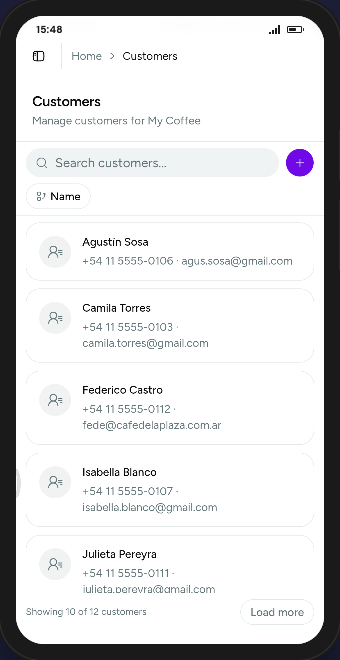 Your customer list is searchable by name, with each record showing phone and email at a glance.
A few things worth knowing
- Vio assigns a unique customer ID automatically when the record is created, so you never have to invent one.
- Customers can have saved shipping addresses (home, office, warehouse) with one marked as the default — those are managed separately from the customer record itself and can be reused on orders.
- Because orders require an existing customer, it’s good practice to set customers up first and search before adding to avoid duplicates.
Ready to build your customer list?
Add your first customer, then move on to products so you have something to sell them.
0 Comments
Join the conversation