
Author
Vio TeamPublished
2 mins readYour assistant lives in the Vio app, but your customers don’t. Channels are how you bridge that gap — they link a messaging platform to one of your workspace’s assistants so it can keep working with you beyond the web and Android app.
Channel creation is admin-only, and you can connect more than one platform to suit your business.
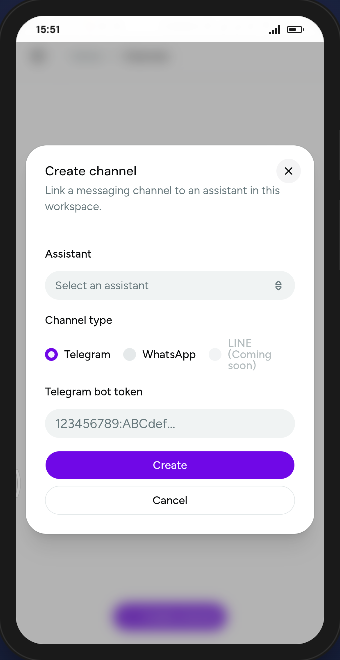 The Create channel dialog links a messaging platform to an assistant in your workspace.
Connect a channel step by step
- Open Channels in your workspace and create a new channel.
- Select the Assistant the channel should be attached to. Each channel is bound to one assistant.
- Choose the Channel type. Telegram and WhatsApp are available today, with LINE marked as coming soon.
- For Telegram, paste your bot token. For WhatsApp, scan the pairing QR code with the WhatsApp app on your phone.
- Create the channel, and it appears in your list with a live status badge.
Once connected, you can manage it right from the list: reopen the WhatsApp pairing view if a channel is still connecting or has disconnected, and change a Telegram bot token if you ever need to rotate it.
A few things worth knowing
- Every channel is bound to one assistant and has a visibility setting (public or private).
- Pairing survives closing the view — if you close the dialog while WhatsApp is still connecting, the channel keeps its status in the list and you can reopen it.
- The pairing QR payload is treated as a sensitive credential and is only ever shown inside the admin-facing pairing view.
- Channel management is admin-only, consistent with other workspace settings.
Ready to meet your customers where they are?
Connect a channel, then let your assistant handle the conversation.
0 Comments
Join the conversation